Introduction
Arduino programming tutorial for beginners is the most common phrase searched in google by electrical and electronics undergraduate students. This topic has become so popular today because it the base of the Internet of Things. The search volume of Arduino programming tutorial for beginners is so high that expert authors on this topic need to elaborate the things step by step. This article too is focused on the basics of Arduino so that Absolute beginners can grasp the concept easily. Here I have made an attempt to explain the project practically and answer the questions to clear the doubts of the readers.
What is Arduino?
In a very simple terms, Arduino is an open-source printed circuit board with a microcontroller. As this board has integrated microcontroller, it means it is programmable. Arduino boards available in market are of various types. The most common one are –
Arduino Uno, Arduino Nano, Arduno Mega, Arduino Micro, Arduino Mini, Arduino Yun, Arduino Fio, Arduino Leonardo, Arduino BT
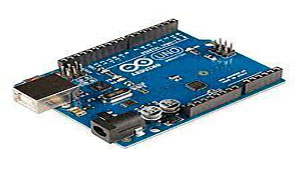
Hardware structure of Arduino Uno
We will deal with the first preferred board Arduino Uno. But before explaining the software or programming part, let us first understand the hardware structure of Uno. The parts are-
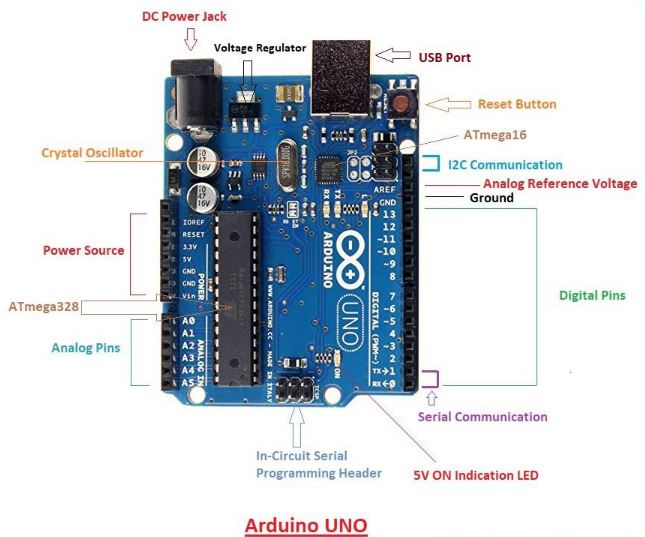
USB Port –
It is used to connect Arduino Board to your Computer or Laptop.
Power supply –
It is used to provide 5V power to Arduino Board. It receives 230 V from main supply and converts it to 5 V – 9V through an adaptor.
Pins –
There are two types of pins in the board namely Analog and Digital. PIN A0 to A5 are Analog and PIN D0 to D13 are Digital Pins. Apart from these power pins and GND Pins are also available in the board.
Reset Pin –
This pin resets and reruns the sketch.
What is the advantage of Arduino?
Arduino is a powerful tool for IoT and Automation for beginners. It has a great advantage. It is a free source and is very cheap . Its normal price in the market varies from Rs 1500 to Rs 1800 per piece, whereas , the clone one is available at Rs 400 per piece. We can create many interesting projects like Obstacle Avoiding Robot, RFID Door lock system, Ultrasonic Radar System, etc. with the help of Arduino.
Software for Arduino – A basic tutorial for beginners
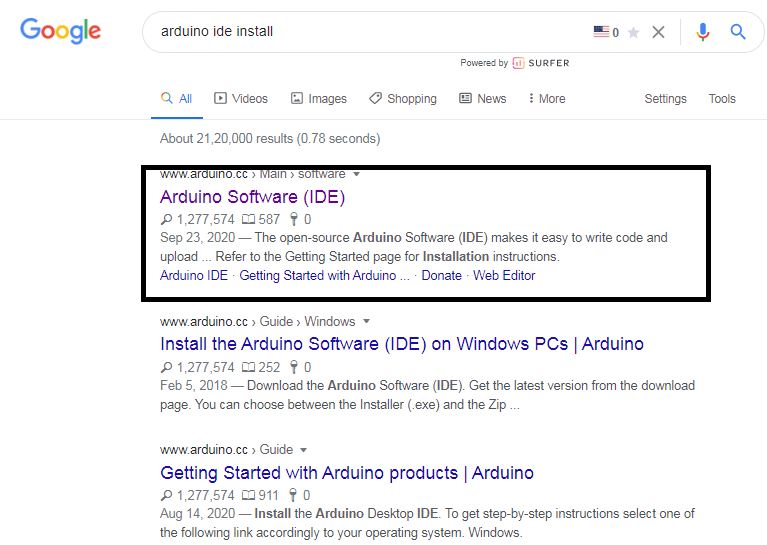
Following are the steps for downloading Arduino IDE
1. Go to Google and search for Arduino IDE Install and click on the first link.
2. Now here ,choose your Operating System :
Windows (32 or 64 bit)
Mac OS X
Linux
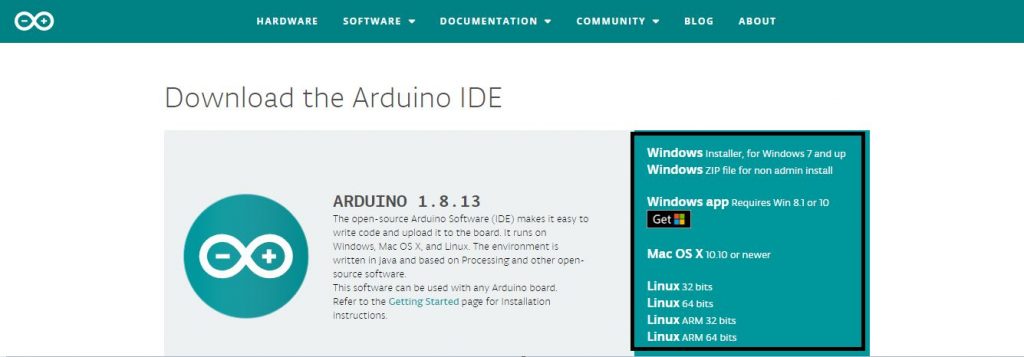
3. Then click on Just Download , and it will be downloaded.

4. Open the downloaded file and then install and setup it.
After the installation process is completed , you can see an icon on your desktop like:
Now open your Arduino IDE. You can see A Menu Bar with 5 options :
1. File
2. Edit
3. Sketch
4. Tools
5. Help
File – Here, you can create a new file or open a file.
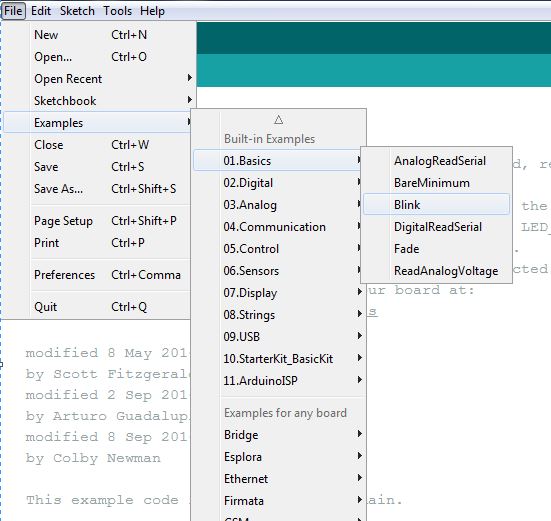
Examples – There is also a Examples option, where you can find many built-in examples of code of any board.
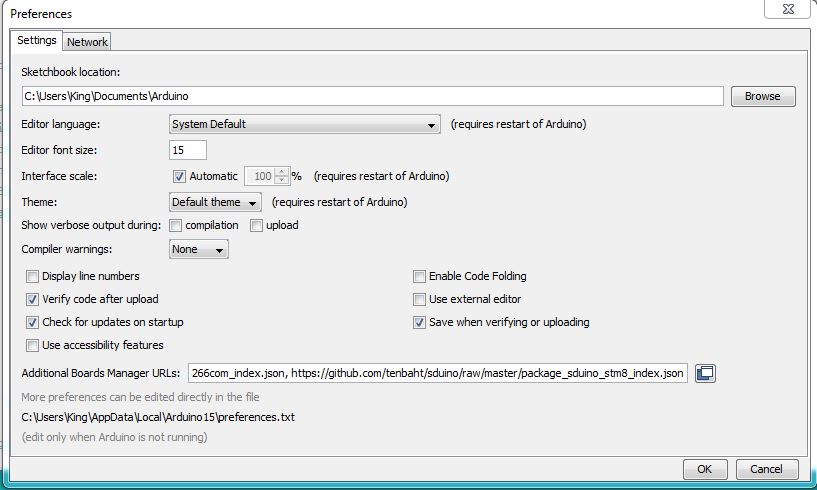
Preferences – There is also a Preferences option, where you can add other boards like esp8266 , STM32 etc.
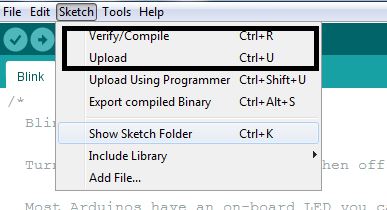
Sketch – Here you can add Library for your program.
Tools – Here you can select a board and com port and in Manage Libraries, you an update and delete libraries.
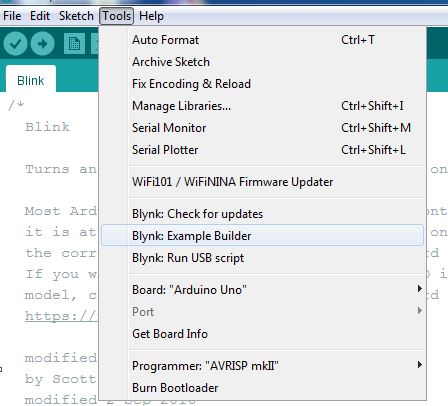
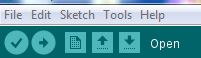
Below, you can find some important tools :
Next is you sketch area, where you can write code and upload to your board.
When you create a new file, you can see some default code like this —
void setup() {
  // put your setup code here, to run once:
}
void loop() {
  // put your main code here, to run repeatedly:
}
Void Setup – Here , You have to type your pin used in arduino or any other board.
Void Loop – Here, you have to put code of which you have to run loop
Example – steps for the to Blink your LED
1. For code, open your Arduino IDE software, go to Examples -> Basics -> Blink . Then click Compile button. After the compilation is successfully done.
2. Connect Arduino USB cable to your Laptop or Computer and select board as “Arduino UNO” and your COM Port. Click on Upload button. This will upload your sketch on the board.
3. Now connect a power supply to your Arduino Board. Arduino UNO requires 5V supply . This can be done by using a Mobile Charger with charging pin suitable for the board.
4. Then take one LED and connect positive terminal of LED to Pin 13 of Arduino and negetive terminal of LED to any GND of Arduino.
Code Explanation
void setup() {
  // initialize digital pin LED_BUILTIN as an output. (Here, LED_BUILTIN refers to PIN 13 of Arduino UNO)
  pinMode(LED_BUILTIN, OUTPUT);
}
// the loop function runs over and over again forever
void loop() {
  digitalWrite(LED_BUILTIN, HIGH);   // turn the LED on
  delay(1000);                       // wait for a second
  digitalWrite(LED_BUILTIN, LOW);    // turn the LED off by making the voltage LOW
  delay(1000);                       // wait for a second
}
Now , if we want to make projects with other sensors or any other electronic components like Ultrasonic Sensor, Bluetooth Module, LCD, Servo Motor etc, we have to add external libraries.
To add libraries from external sources , we took the help of Github. Adding Libraries tutorial will be available on Next Article.
Run the code and Enjoy the project in action !!!
Troubleshooting the mistakes while using Arduino
1. Never forget to right board
2. Check whether Laptop COM Port and Arduino COM Port match.
3. Make sure to install the correct and required library .
4. Always Check for baud rate as 9600 in code.
5. Always compile your sketch before uploading.
Use of “{}” and “;” in the code
“{}” is used to group a function and declaration. It shows the start and end of a function, loop or any conditional function.
int myFunc(){
//your code
}
“;” is used to show the end of any statement.
int=5;Conclusion
I expect that this article on Arduino programming tutorial for beginners shall help a lot to the students aspiring notes on Arduino and clear their basic doubts. Hope you’ll like the article and post your valuable comments to update the topic.